Discover how the ARMxy embedded computer, combined with ThingsBoard IoT Gateway, enables real-time device monitoring, data visualization, and remote control.
Case Details
Case Details
The ARMxy embedded computer, integrated with the ThingsBoard IoT Gateway, provides a flexible and scalable Device–Edge–Cloud solution for industrial IoT applications.
In this case, the system is used for production line equipment monitoring and remote control, enabling real-time data acquisition from PLCs, inverters, and sensors, while supporting remote parameter configuration and device control via the cloud.
ARMxy seamlessly connects field devices to the ThingsBoard platform, enabling data visualization, alarm management, and remote operation.
Preparation
Before starting, please ensure you have:
Getting Started
1, Install the ThingsBoard IoT Gateway on the ARMxy BL410.
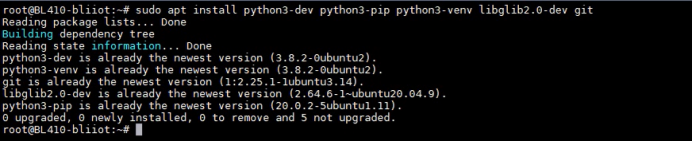
Use apt to install the required libraries into the system.
sudo apt install python3-dev python3-pip python3-venv libglib2.0-dev git
Obtain the gateway installer from the official GitHub repository
git clone --recurse-submodules https://github.com/thingsboard/thingsboard-gateway.git --depth 1

After installation, run ls to view the contents of the directory, which should now include a thingsboard-gateway folder.

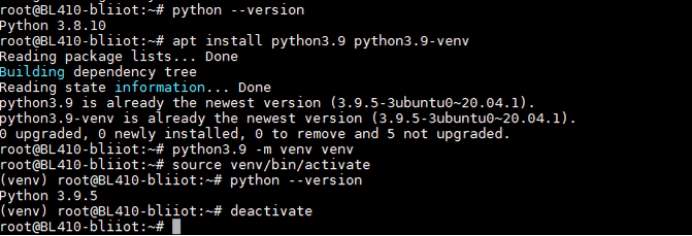
ThingsBoard Gateway requires Python 3.9. First, check your installed version with the python --version command. If your version is lower than Python 3.8, you will need to set up a new virtual environment. Begin by installing Python 3.9 and the required component using: apt install python3.9 python3.9-venv. Once installed, create a new virtual environment with python3.9 -m venv venv.
Activate it using source venv/bin/activate. To exit the virtual environment, simply run deactivate.
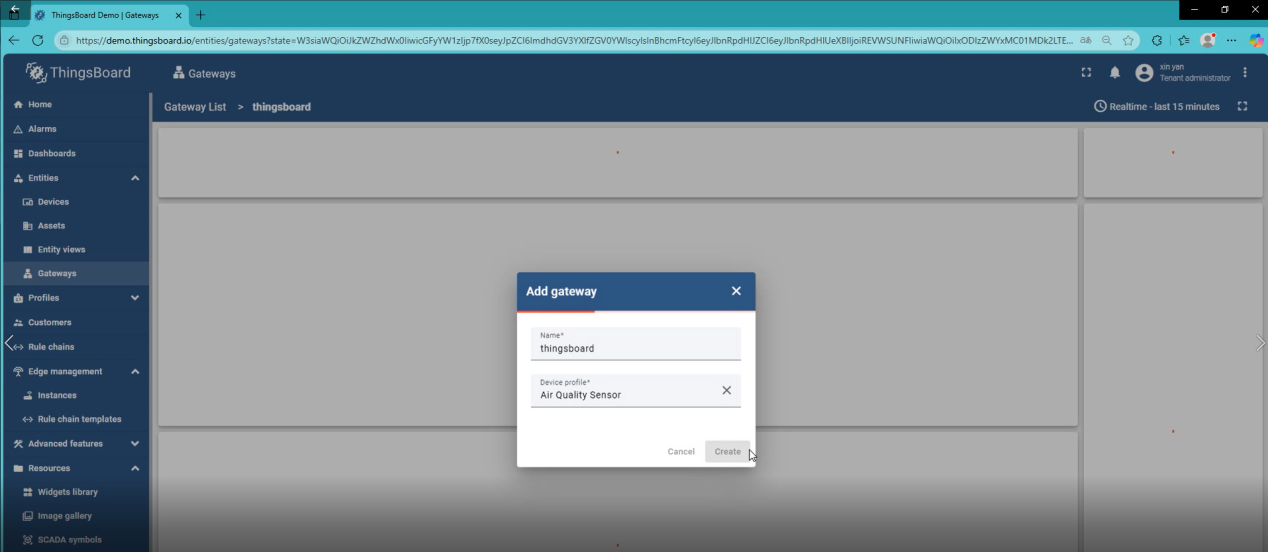
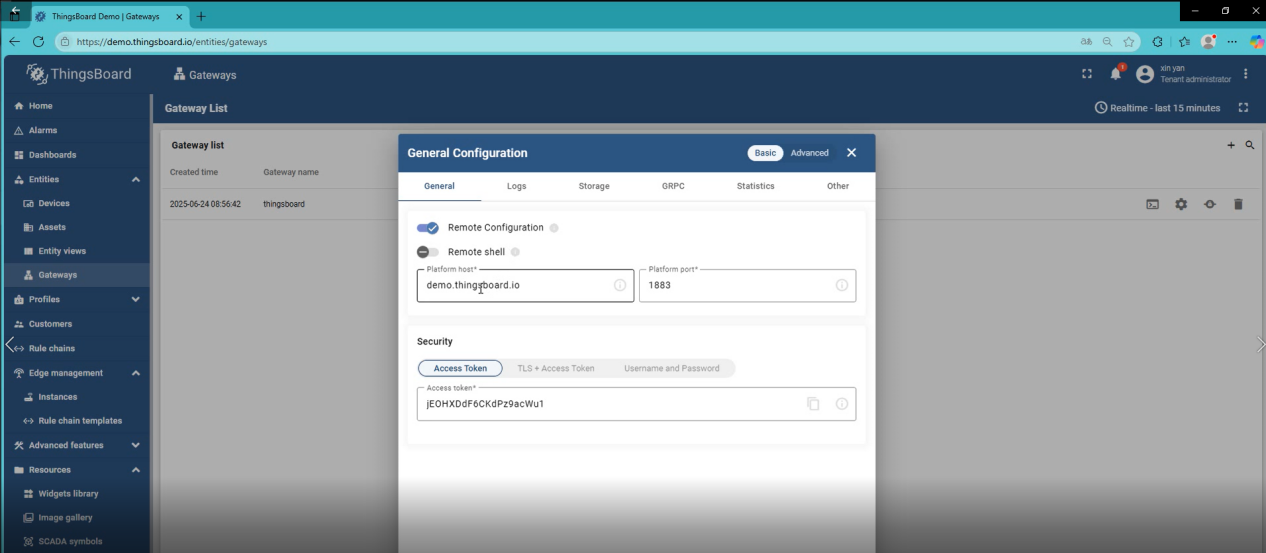
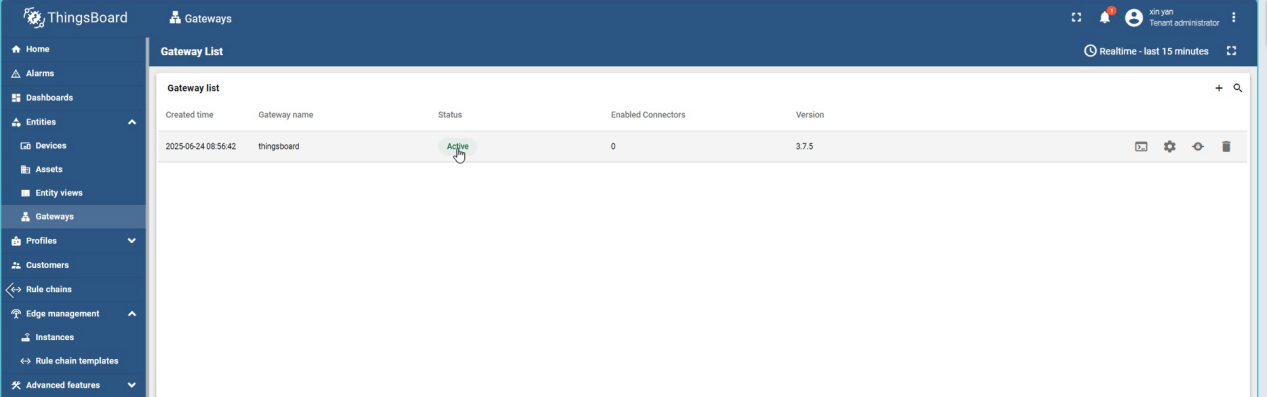
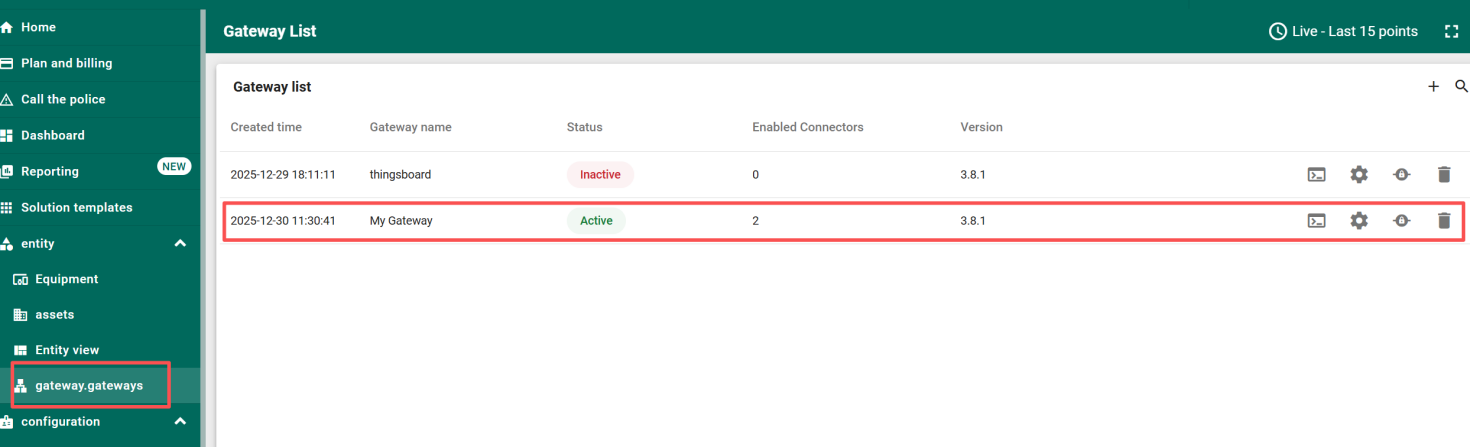
To obtain the Platform host and Access Token, log in to your ThingsBoard Cloud platform. Navigate to Entities > Gateways, then click the "Add Gateway" button. Fill in the required information to create and configure your new gateway.
Click on General configuration. In this section, locate the Platform host and Access token fields, and make sure to record their values.
Return to the ARMxy device's operating system. Navigate to the gateway directory with the command cd thingsboard-gateway. Then, create and activate a virtual environment in one step by running: python3 -m venv venv && source venv/bin/activate.
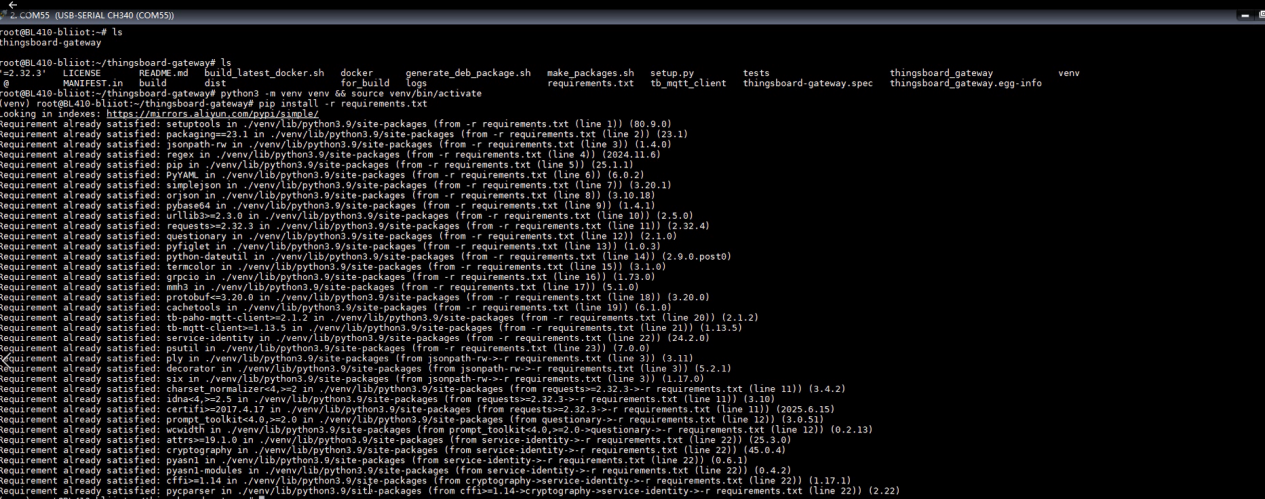
Install the required Python packages using: pip install -r requirements.txt
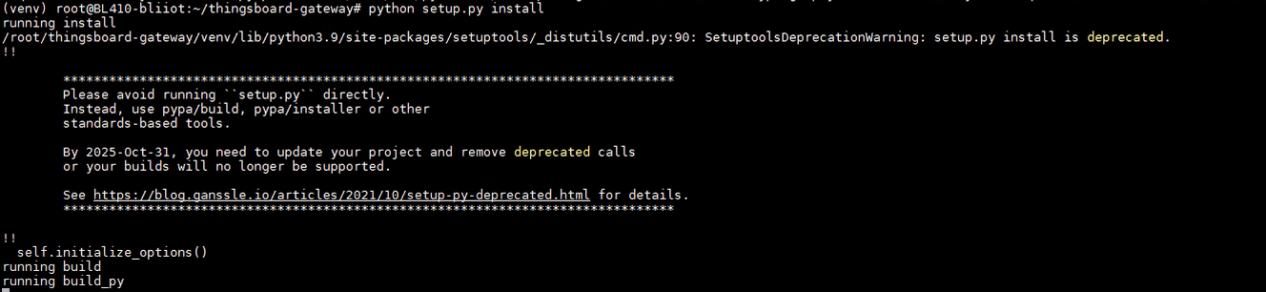
Then, install the gateway libraries by running: python setup.py install
Create a "logs" directory by running the command: mkdir logs

Enter thingsboard-gateway/thingsboard_gateway/config

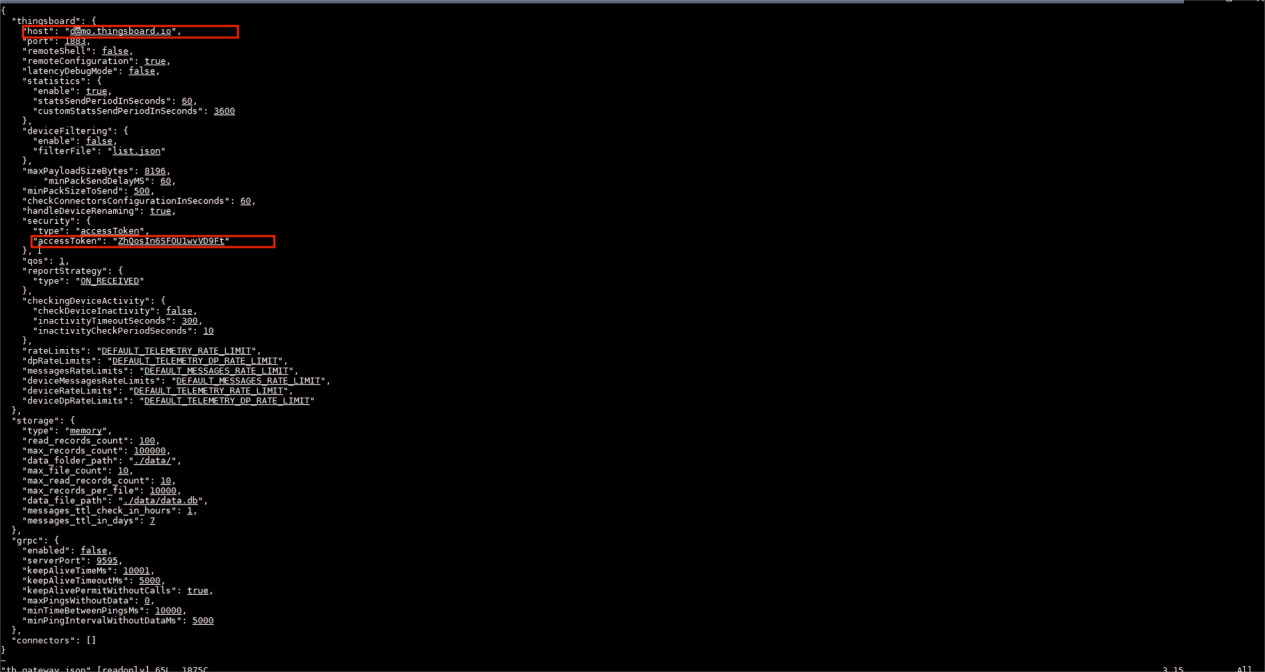
Open vi tb_gateway.json, modify the values for "host" and "accessToken" to the Platform host and Access Token you recorded earlier.
To run the gateway, execute the command: python3 ./thingsboard_gateway/tb_gateway.py
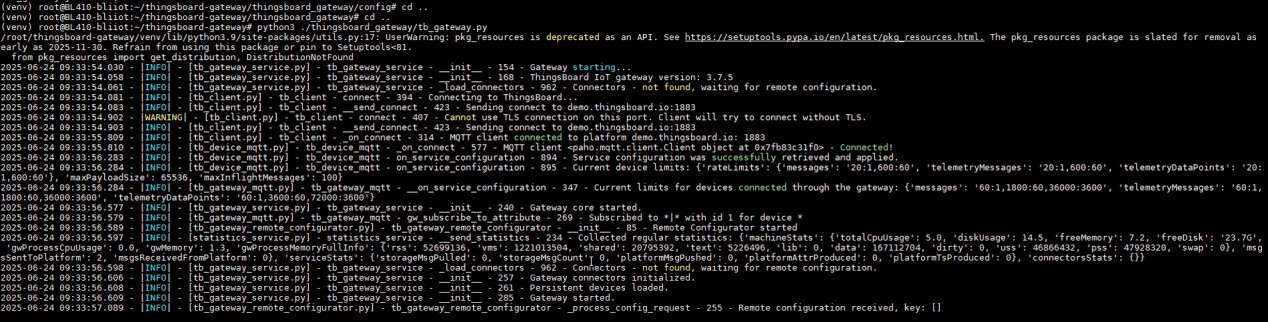
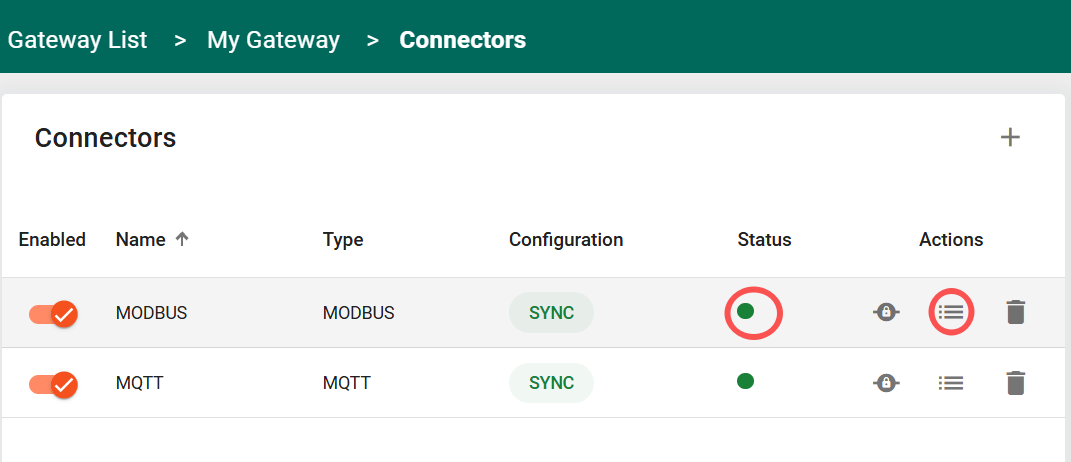
Return to the ThingsBoard platform and check if the gateway's status has changed. A status of "Active" indicates a successful connection.
2, Protocol Conversion & Data Flow
The ARMxy device connects to Modbus sensors via its RS485 interface. The ThingsBoard Gateway translates the register data into standard MQTT messages and uploads them to the cloud-based device shadow. The solution supports local data persistence (e.g., using SQLite). Data is cached during network outages and automatically synchronized once the connection is restored.
3, A Practical Guide for Modbus Data Acquisition and Cloud Integration
1) The ThingsBoard IoT Gateway has been successfully ported to the BL410 development board and starts normally.
2) A Modbus Slave simulator acts as the data source, providing test data.
3) A ThingsBoard cloud platform account and a device (with MQTT connection credentials) have been created.
4) The BL410 and the Modbus Slave must be in the same local area network (LAN).
5) The BL410 must be able to ping the Modbus Slave PC IP address.
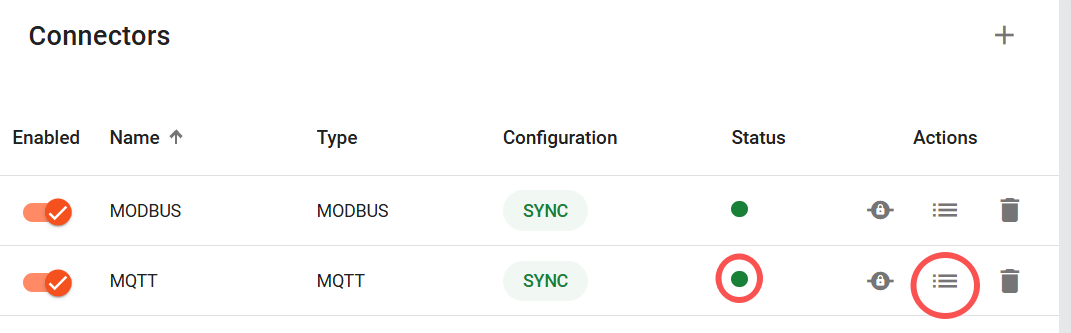
Configure the MQTT Connector
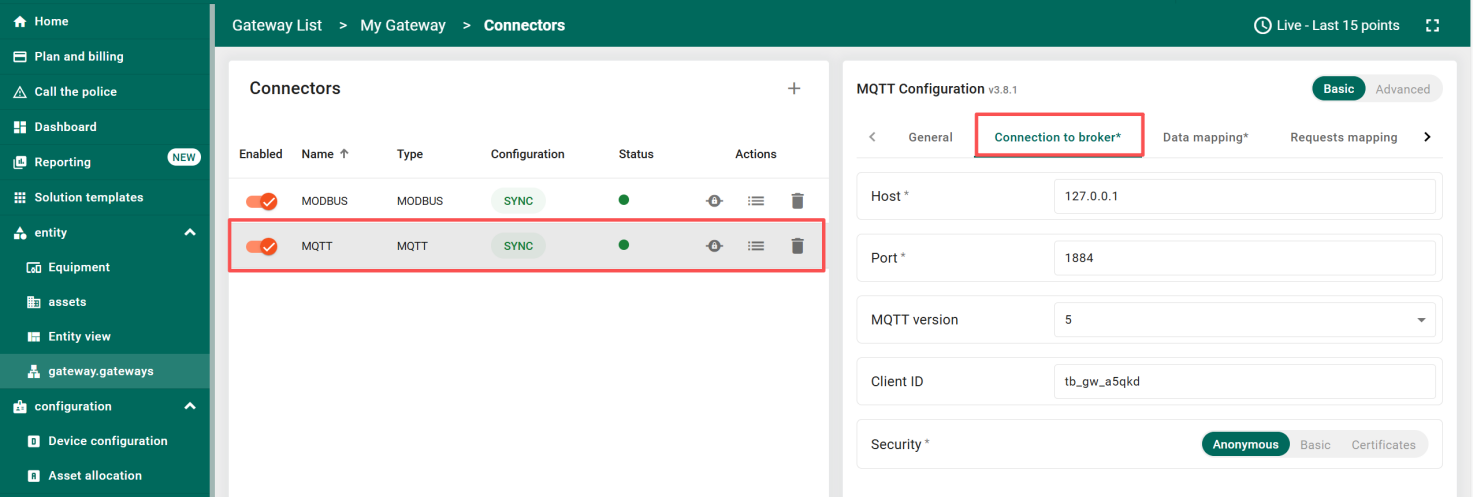
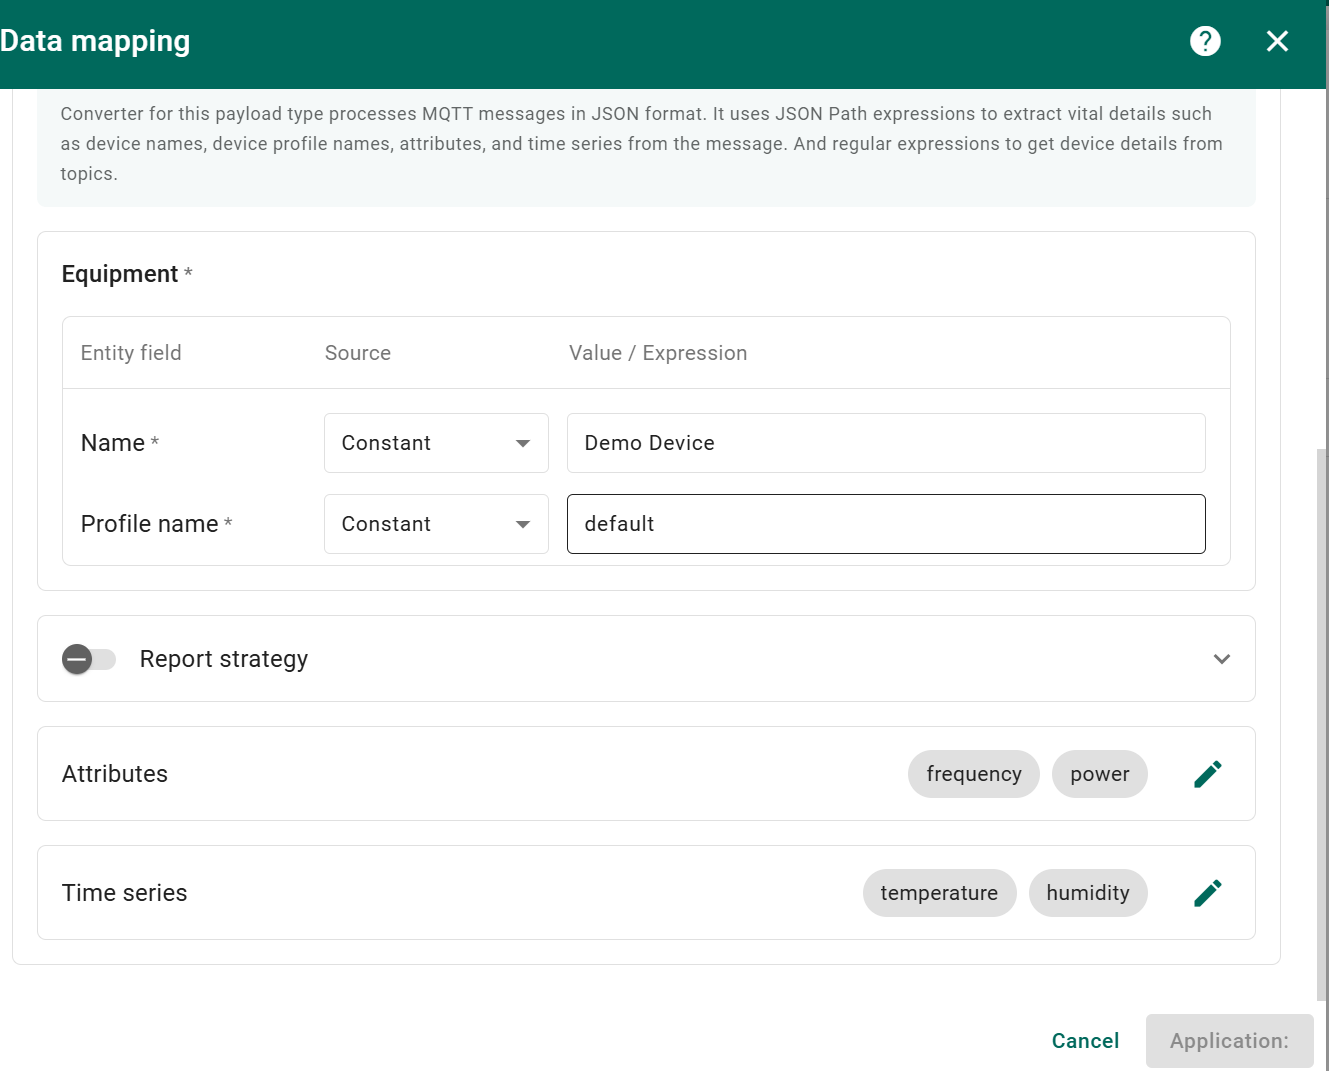
Configure data mapping. After configuration, the status will be synchronized with the remote server.
Use the mosquitto_pub command to publish data to a specific MQTT topic:
mosquitto_pub -h localhost -p 1884 -t data/ -m '{"frequency": 50, "power": 100, "temperature": 25, "humidity": 60}'

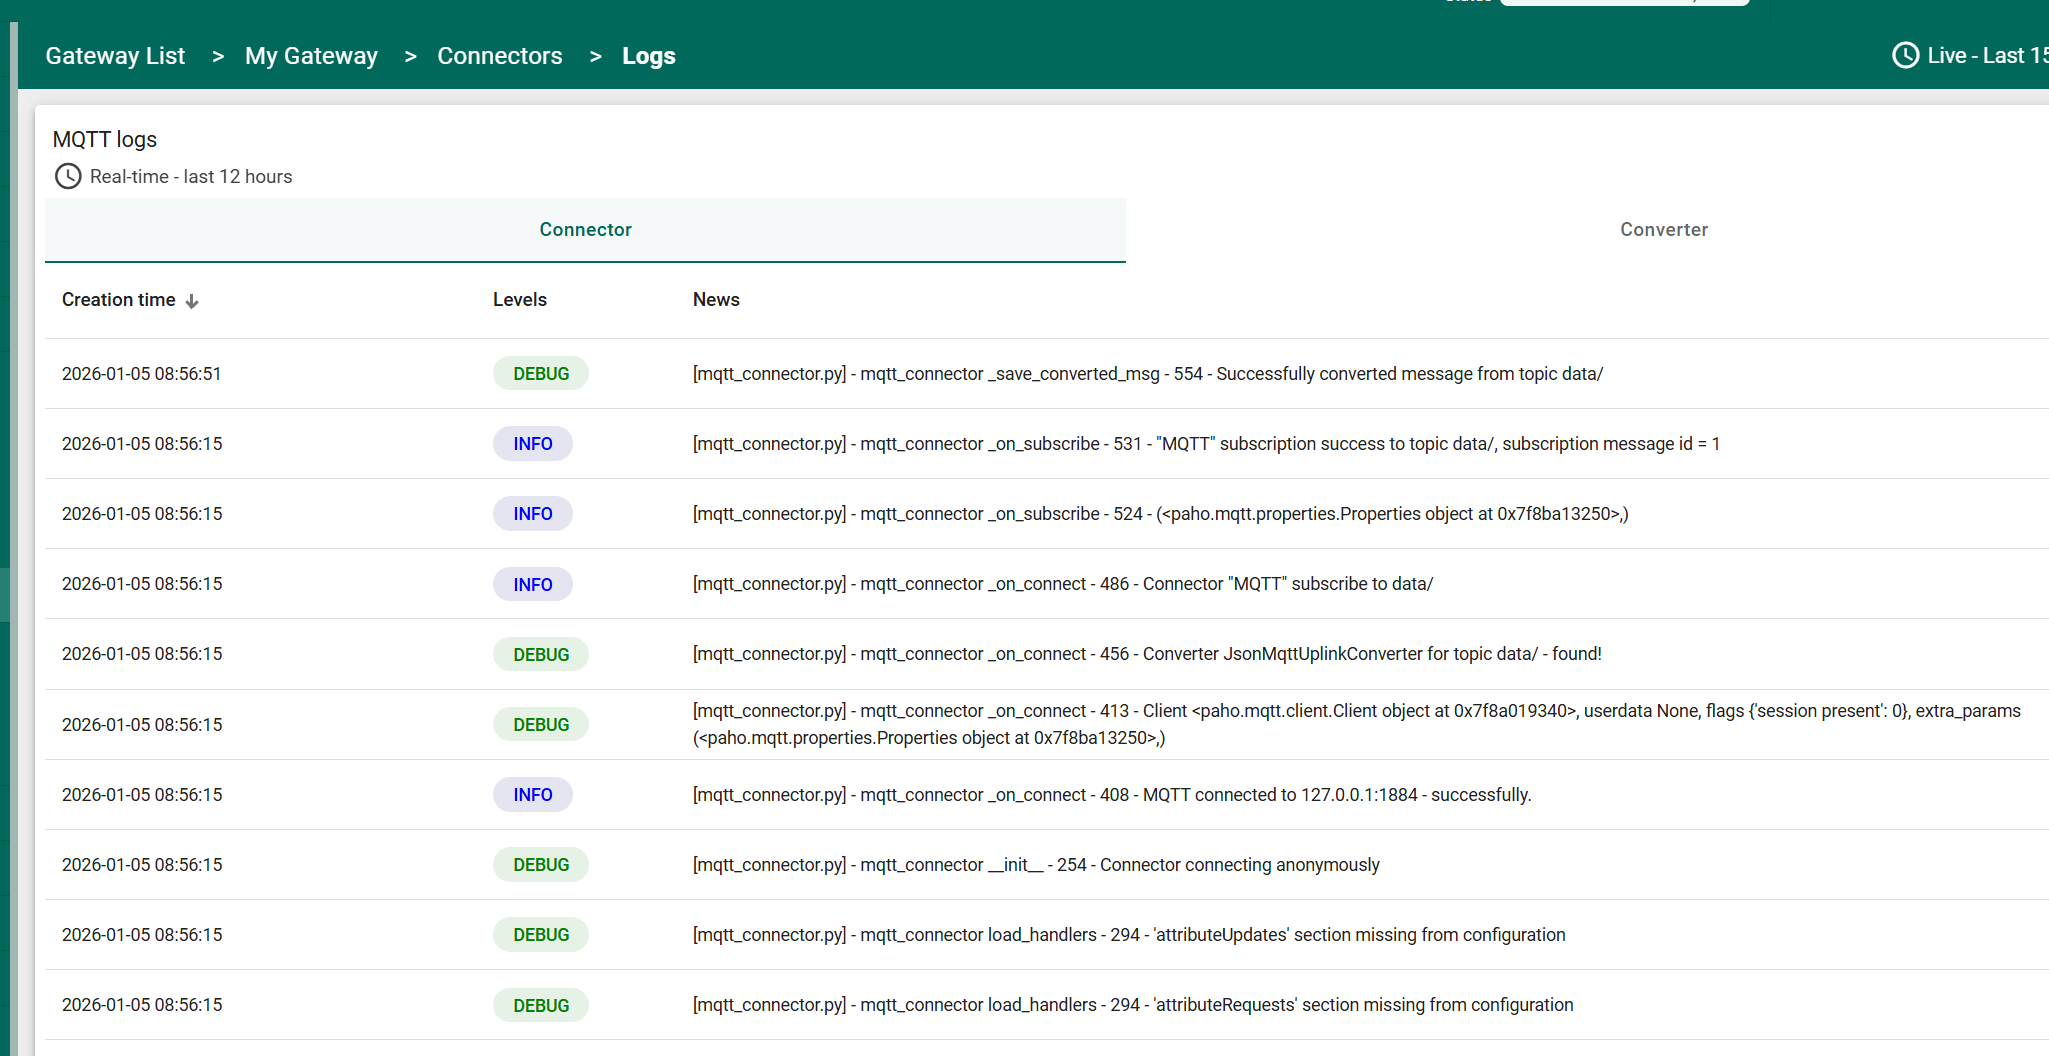
You can check the connector logs to ensure the connector is working properly. Click the “Logs” icon to open the connector log page.
The Logs table contains the columns Created Time, Levels, and News.
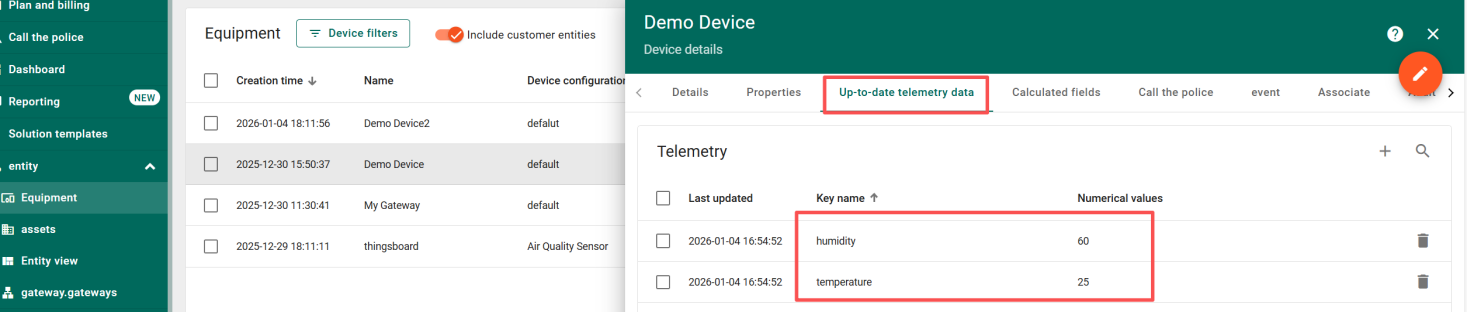
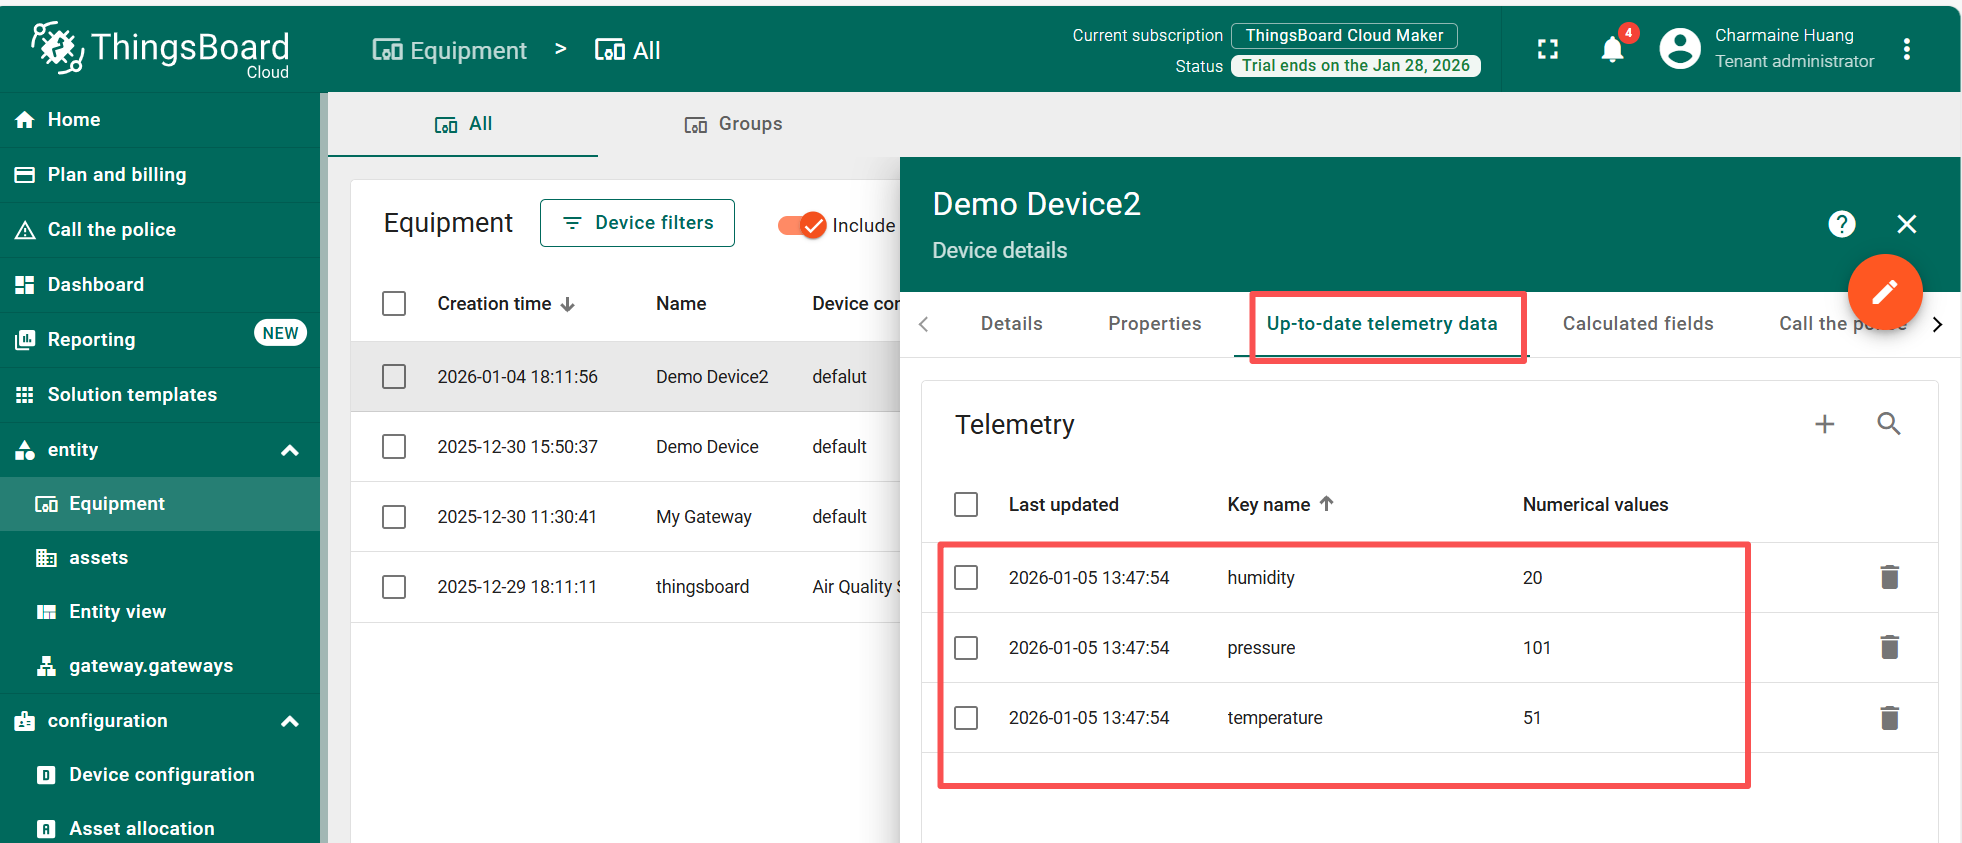
Go to the “Up-to-date telemetry data” tab to view real-time telemetry data from the device. You can see telemetry such as humidity and temperature.

Configure the Modbus Connector
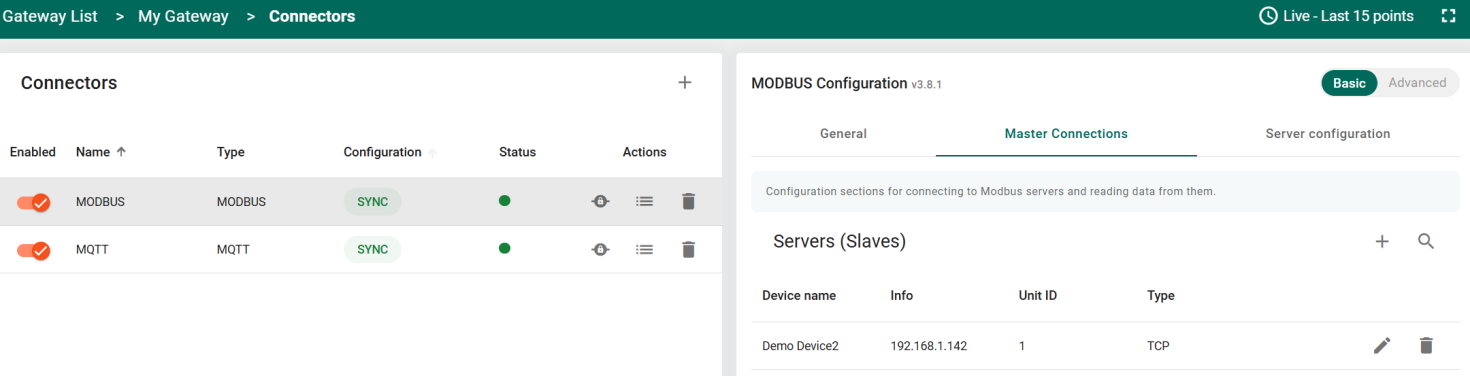
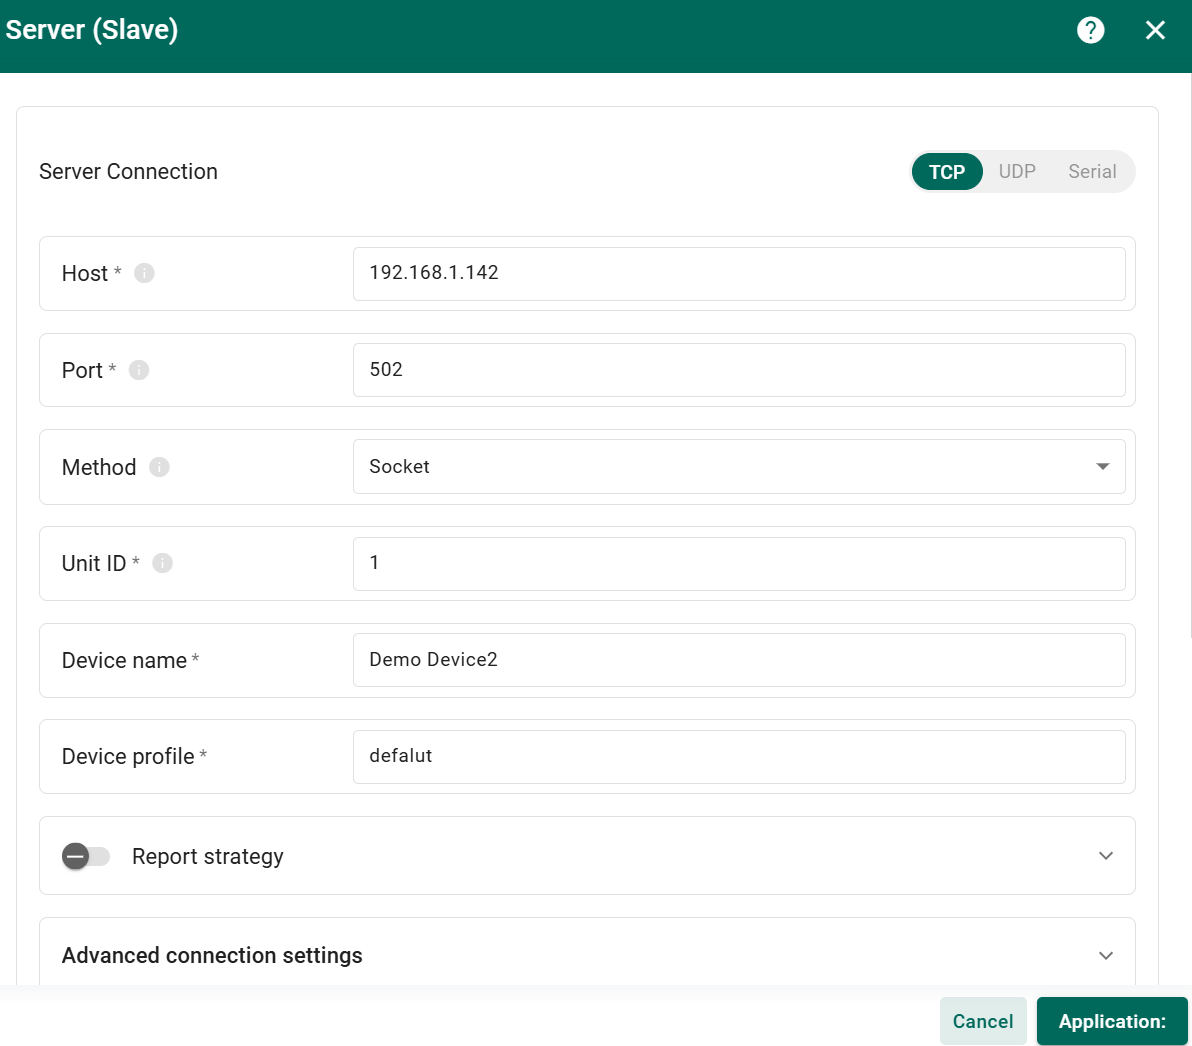
Add a new slave and configure the connection parameters.
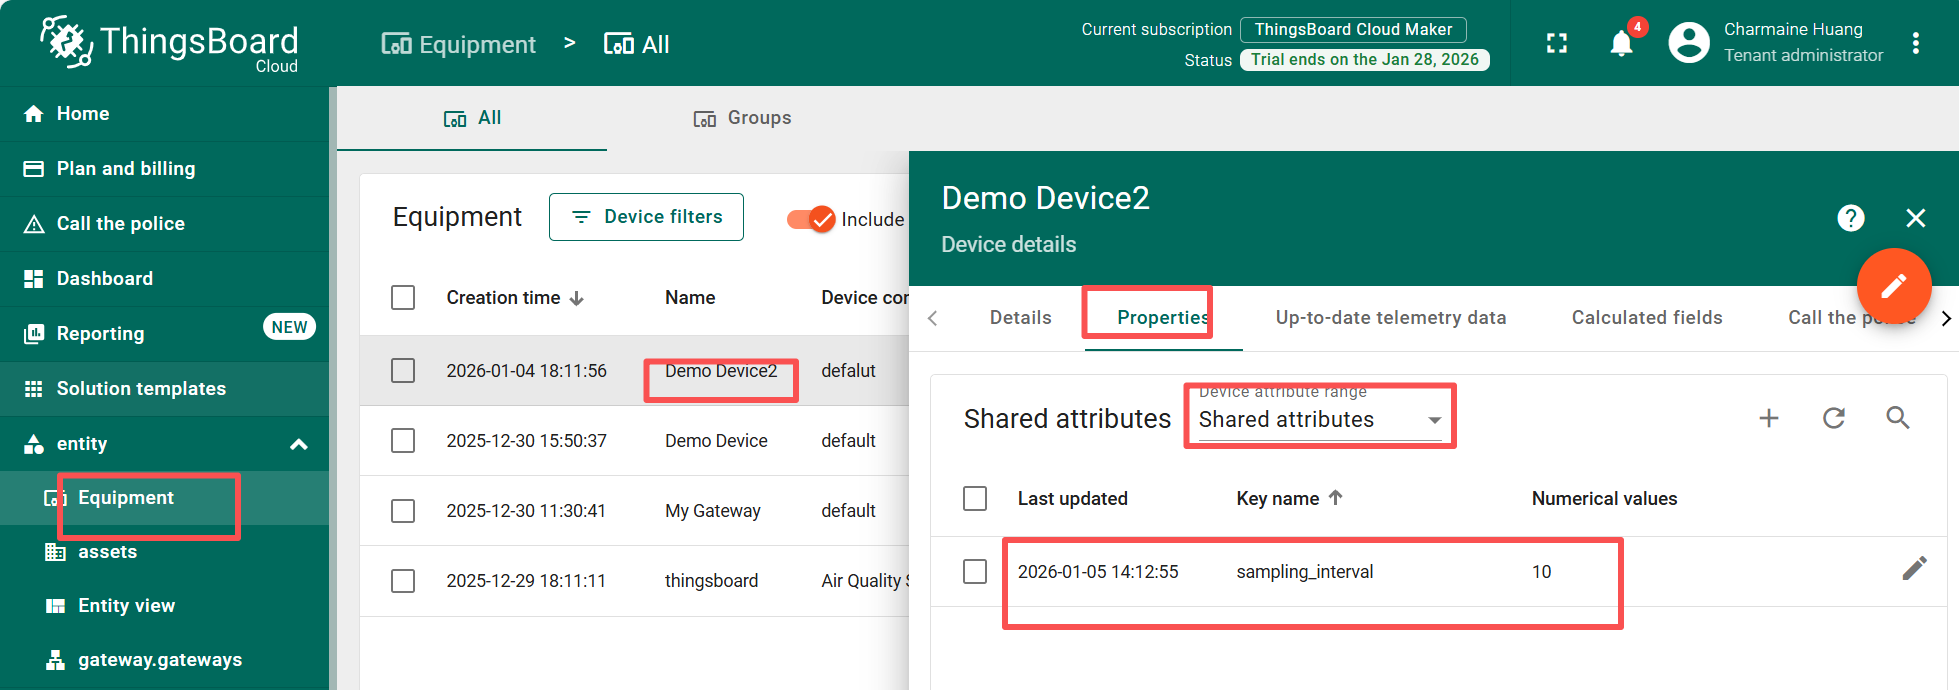
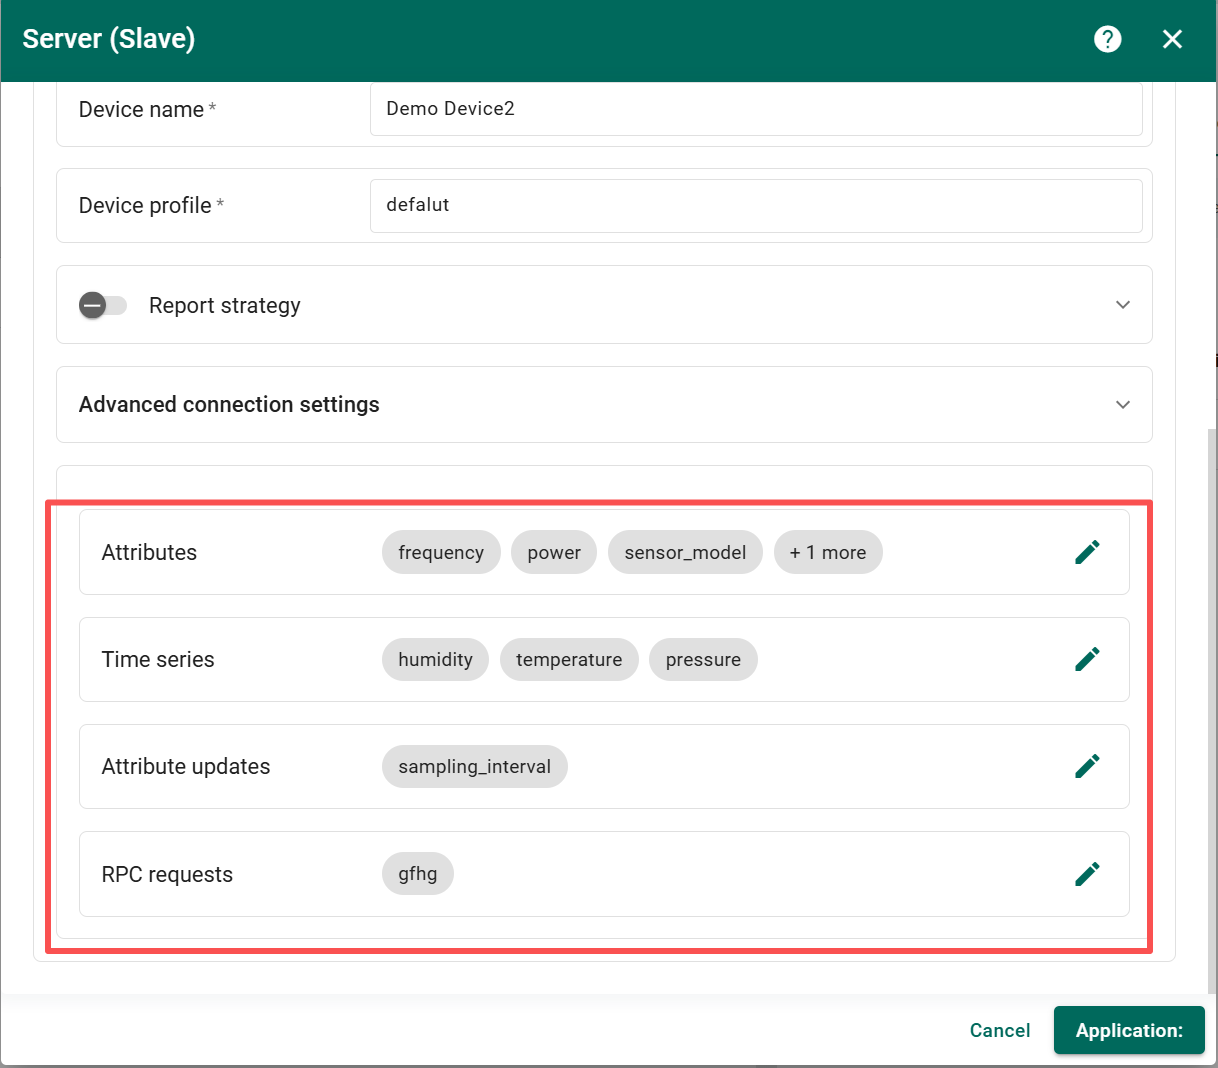
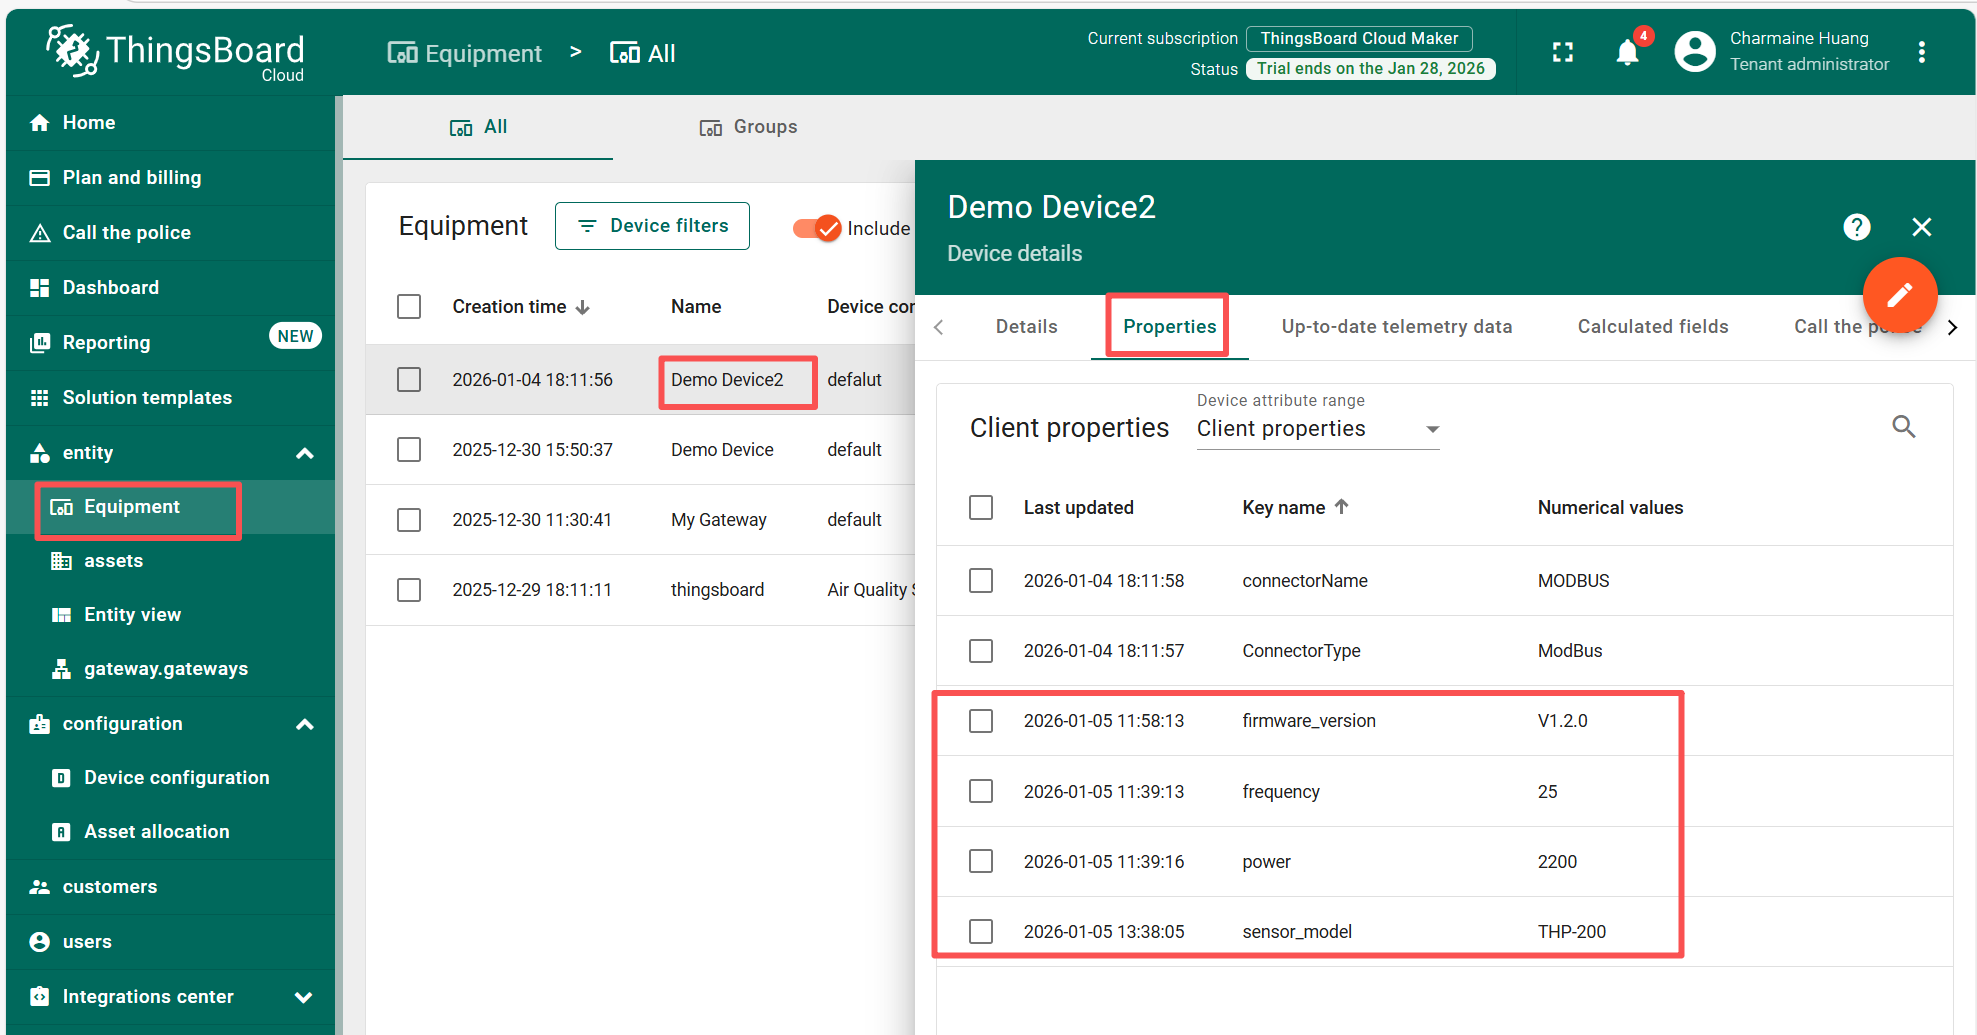
Configure the device Attributes, Time Series, Attribute Updates, and RPC Requests.
Check the connector logs to verify that the Modbus connector is operating correctly.
The logs table includes Created Time, Levels, and News.
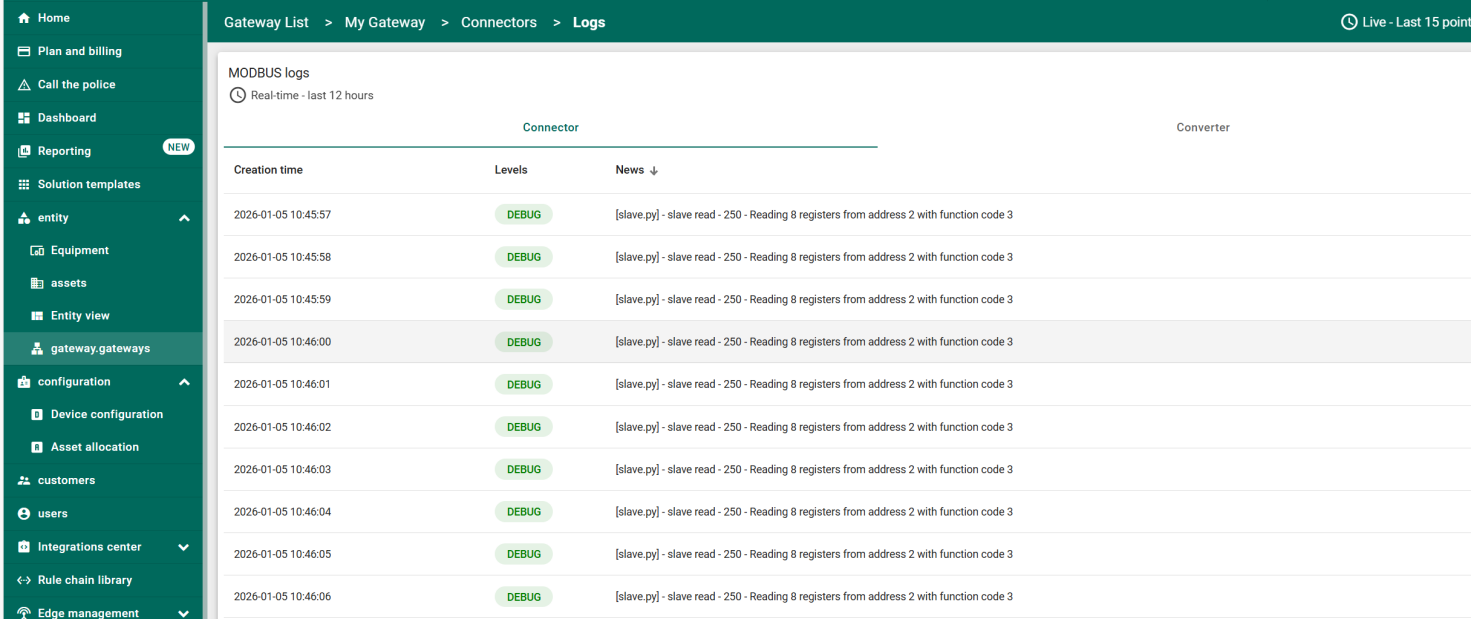
Modbus messages can be monitored to confirm correct data acquisition.
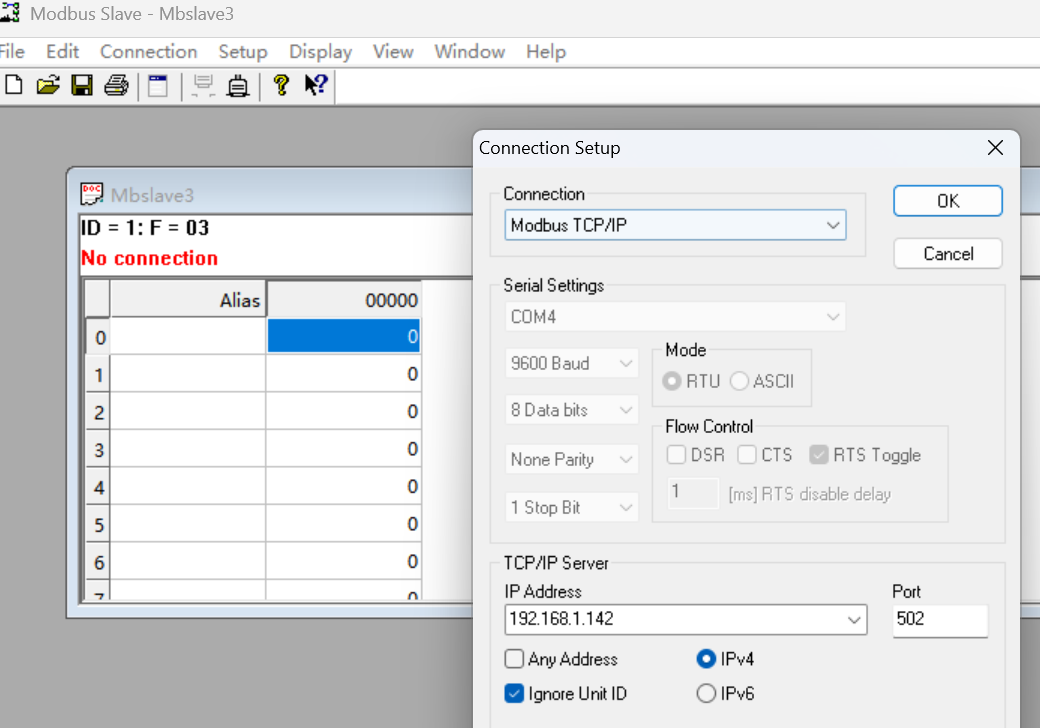
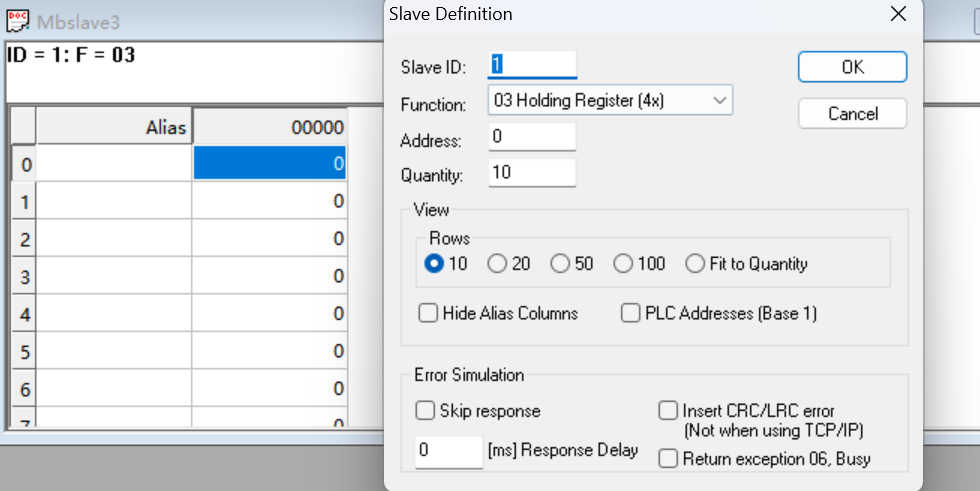
Configure the Modbus Slave (Simulated Device)
1) Modbus Slave TCP configuration
2) Configure ThingsBoard IoT Gateway on BL410
Enable Modbus data acquisition and MQTT data uplink on the BL410.
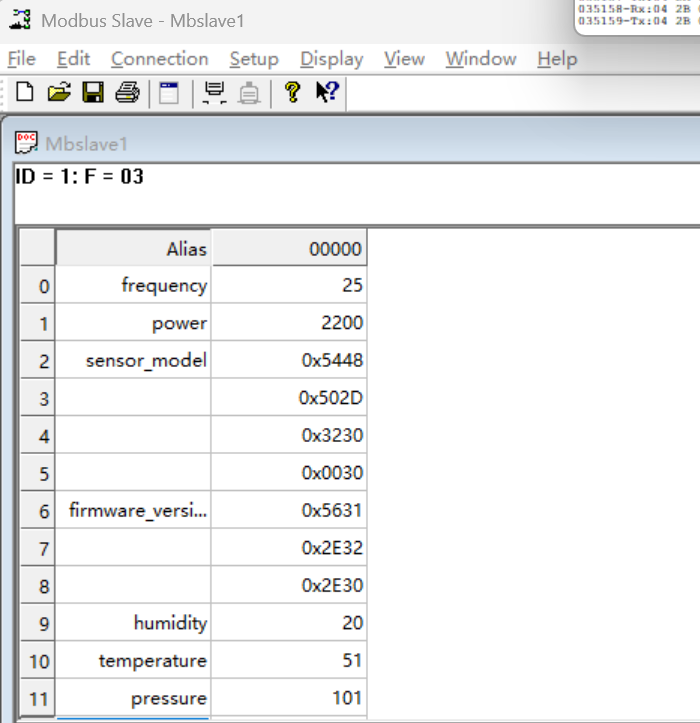
3) Enter the “Up-to-date telemetry data” tab to view real-time updates such as temperature and humidity. This tab provides continuous telemetry updates from the device.
4) Attribute updates can be performed by updating register values on the Modbus server.